Playing Music in Your 3DX Room
by Amber Marlow
Playing your own music in your 3DX room can be a daunting task. The reason for this is that the radio widget in 3DX needs an audio stream in the cloud to connect to. But how do you create one of those and how do you get it to play the music that you have on your local computer?
It is important to understand that in any 3DX audio setup there are two major parts:
- A radio stream that is running somewhere in the cloud. This is what 3DX will connect to using the radio prop.
- A streaming application that runs on your local computer that sends your music to the radio stream for broadcasting.
This guide will help all 3DX players to setup internet radio streaming in their room. No technical skills required, just follow the steps exactly. Let’s first look at setting up a radio stream.
Setting Up a Radio Stream
Players have two main options for obtaining a free internet radio stream: Listen2MyRadio, and Zeno FM respectively. Each have their own benefits, features and caveats that we’ll briefly touch upon. These services have no affiliation to the 3DXChat community and operate globally.
Listen2MyRadio
To create a radio stream on Listen2myradio follow these steps:
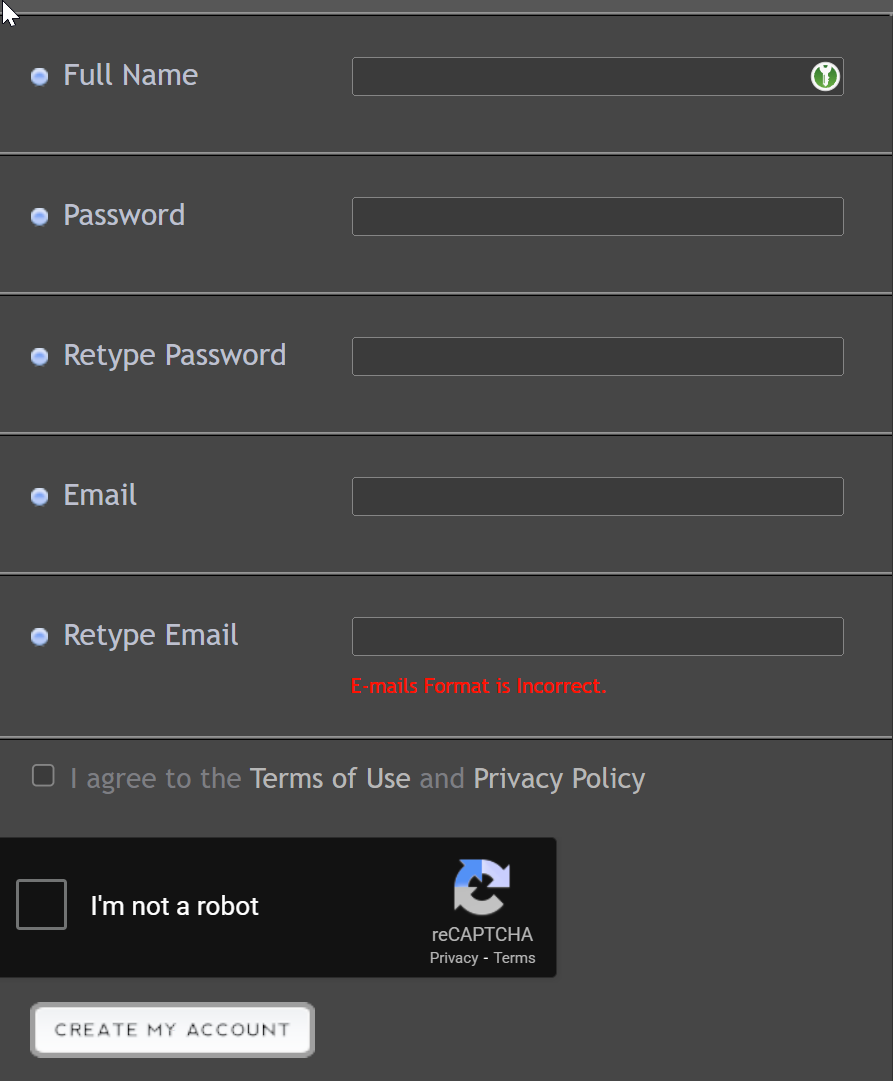
- Visit the signup page to create a free account. Note that free accounts are subject to streaming advertisement injections.
More…
- Fill out all required fields on the page including Full Name, Password, Email, and accept the terms and conditions. Solve the captcha to prove you’re not an automated bot.
- You will receive an activation email on the address you used to register. Ensure to check it and follow any included instructions related to account activation.
- Once activated, login to your account using the top right Login button on the page using your new credentials.
- Once logged in, ensure that your server type is Icecast on the right panel under Stream Details.
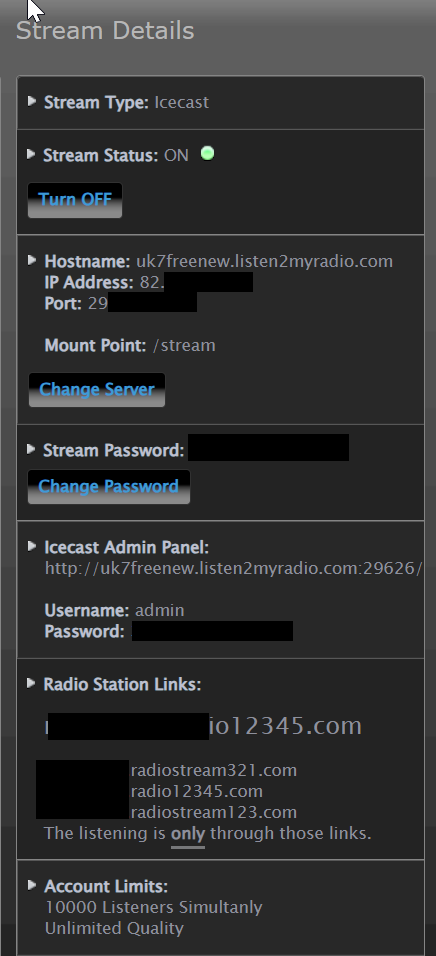
- From the Stream Details panel ont he right side of the page you need to write down the following information for setting up the streaming application in the next step:
- Hostname
- Port
- Mount Point (Do not include the trailing slash, so in the above example it is stream)
- Username – this is not actually displayed in the Stream Details panel and is always source.
- Stream Password (careful, do not use the Admin Panel password!)
ZenoFM
ZenoFM is no longer a free service and requires a paid subscription. Paid subscriptions do not have injected ads. Subscriptions start at $35 USD monthly with a 7-Day Free Trial. To create a radio stream on ZenoFM follow these steps:
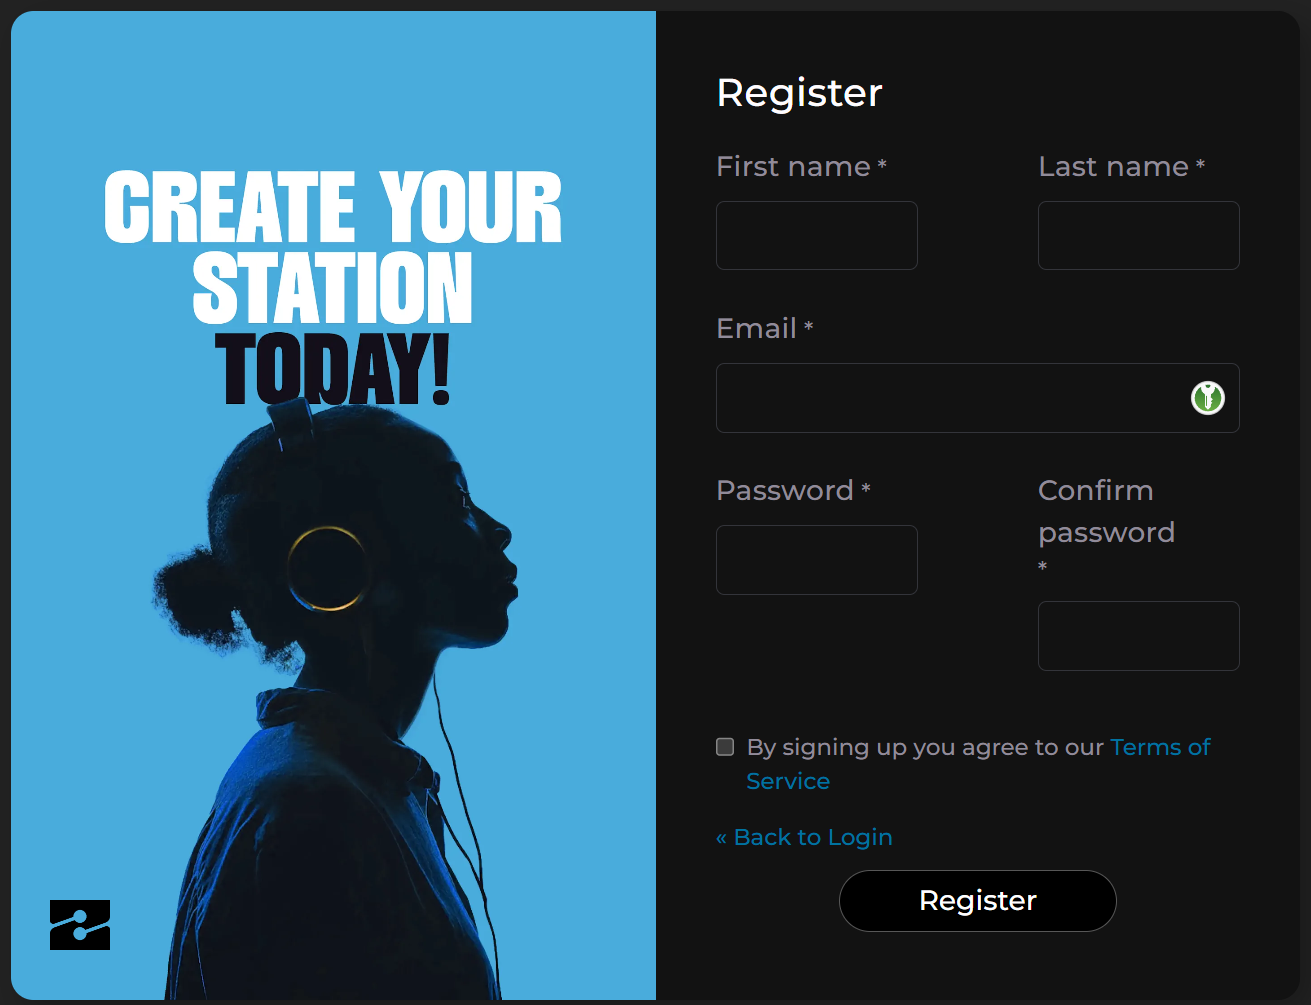
- Visit the signup page to create an account and purchase a subscription.
More…
- Provide First Name, Last Name, Email and Password to register.
- You will receive an activation email on the address you used to register. Ensure to check it and follow any included instructions related to account activation.
- Once activated, click here to login to your new account.
- At the top left of the page, click the overflow menu (3 lines), select Stations, then Add Station. Name your station anything you want, it’s not public. Once created, visit the station page.
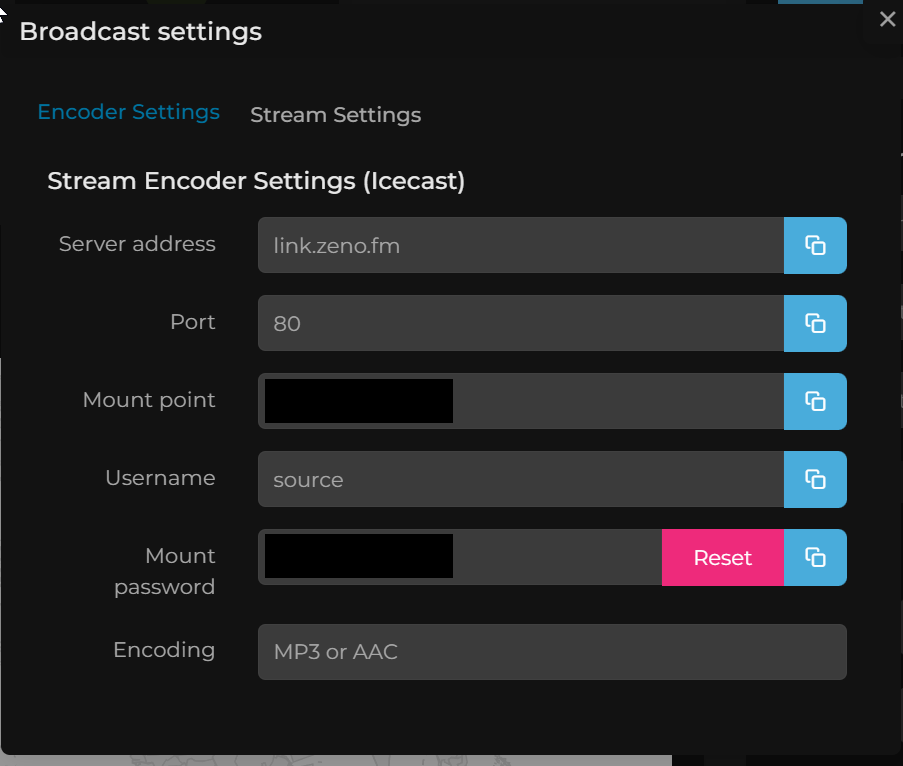
- At the top right click the Broadcast Settings button to show your connection details. Write down the following information for setting up the streaming application in the next step:
- Server Address
- Port
- Mount Point
- Username, use source
- Mount Password
Now we have a radio stream, we need to get it to play our music. For this we will need a streaming application on our local computer. Let’s look at how we can set that up next.
Setting Up a StreamingApplication
If you plan on doing any serious DJ-ing in 3DX you will probably want to look at applications such as Mixxx or RadioBoss, depending on what kind of DJ you want to be. For just playing music in your own room or a small club however, there is a simple solution that was made with 3DXChat in mind: Resin. To install Resin follow these steps:
- Download resin from here. Extract the downloaded zip archive.
- Navigate to the extracted Resin_2.0 folder. Double-click the Resin 2.0 windows shortcut to launch Resin. When Resin launches it checks to see if you have the required audio driver installed. If it is already installed, Resin will launch. If it isn’t installed, the launcher will install it for you. Click Accept/Allow when windows asks if you want to install the driver. The install will happen silently.
- Once the audio driver has been installed, Resin will launch for the first time. It will not function at this time if you haven’t yet restarted your PC after the installation. Take this opportunity to configure your connection settings in Resin so that when you restart, you can simply run Resin and hear your music in your room.
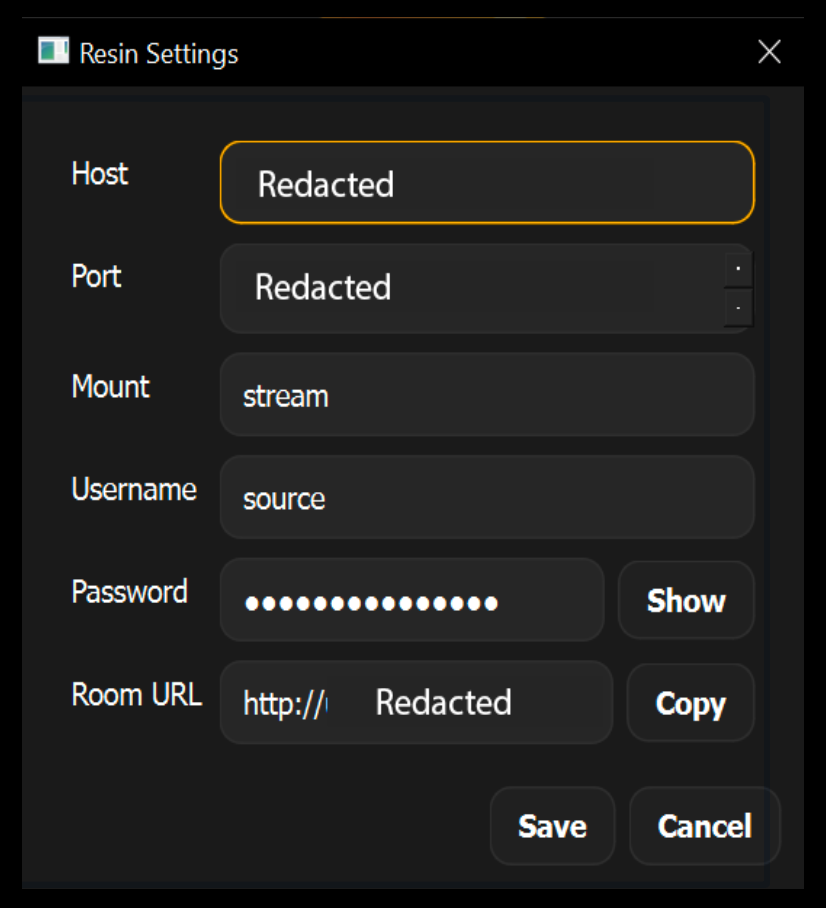
- Click on Settings in the Resin Console Window. You’ll see the window popup that looks like the example. Fill in your connection details depending on who your provider is. Resin supports both ZenoFM and Listen2MyRadio and source is used by default for both providers as a username.
- The Room URL at the bottom will be automatically generated for you depending on your connection details. Copy that link and paste it into the radio prop in your 3DX room.
- Assuming you haven’t restarted your PC yet, save all your work and restart now. You must restart your PC after installation to use Resin.
- Once your PC has been restarted, you can double-click the “Resin 2.0” windows shortcut and launch Resin. If you’ve entered your connection details correctly you can click Start and run Resin.
- If everything goes right, the Resin Console will indicate success and further instructions. Once it’s running, toggle your radio on/off/on in-game and wait about 10–20 seconds. You should hear audio in your room.
- Now that you’ve made a clear connection to the room, you’ll need to tell Resin which windows application you want to send to your room. Click the “Mixer” button in the Resin Console window to open the Windows App volume and device preferences window. Like in the example below, you find applications such as google chrome, or firefox, or Spotify or any app in that list that outputs audio. In the Output dropdown of any app, select CABLE Input (VB-Audio-Virtual-Cable).
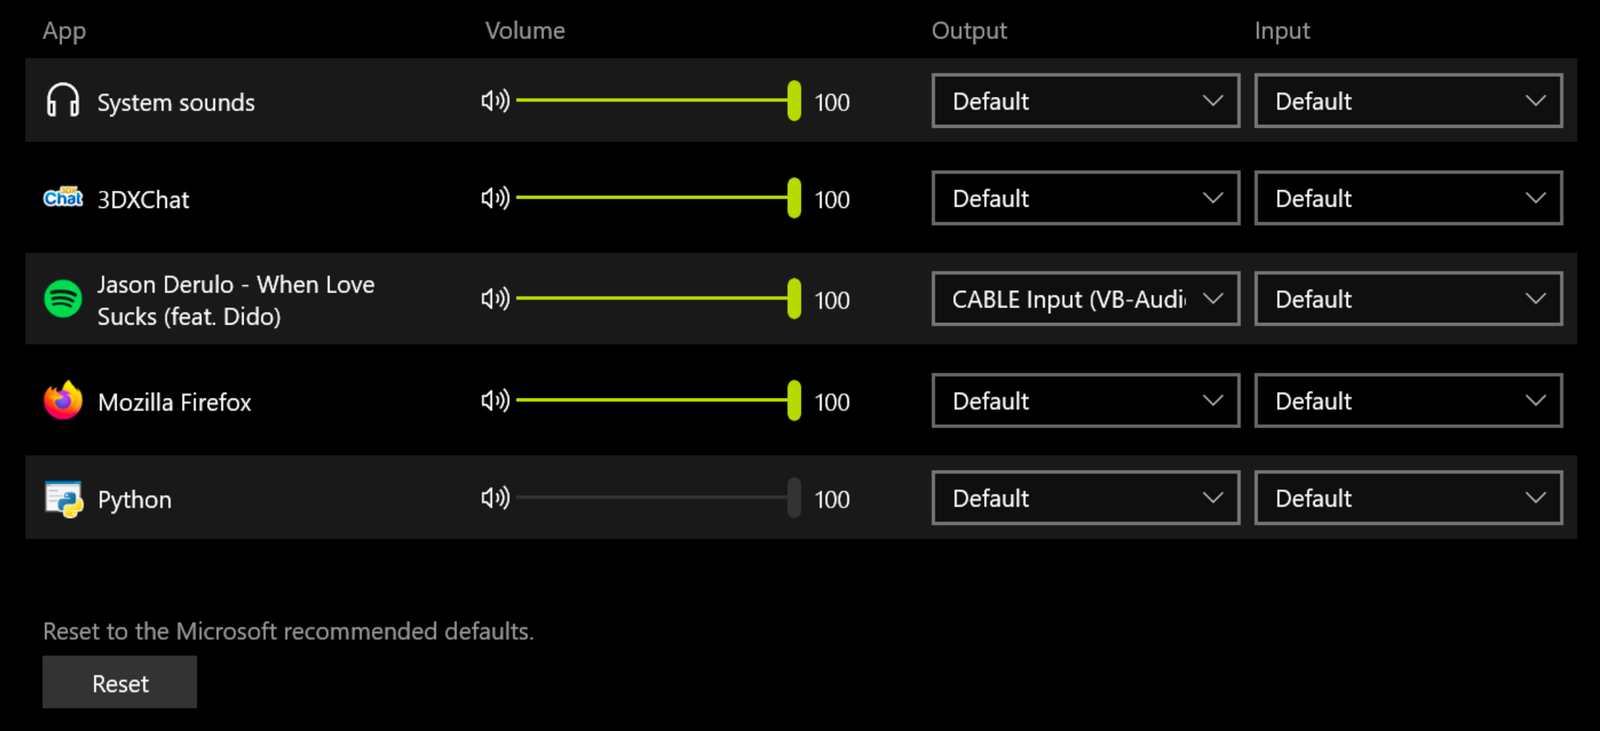
- You should hear any currently playing audio go silent. This indicates you’re sending audio to your room if Resin is running. In your room in 3DX, while not in World Editor, toggle your radio, wait 20 seconds, and you should be hearing the audio in your room from which ever source you picked.
Hopefully this guide can help you to get music going in your 3DX home. Please do be aware of the terms and conditions of any music service or application you use as the source.
This is great info. I have been hosting music at the Lake and use a service via GeckoHost. It is subscription based and I pay USD 10.95 / month and get unlimited bandwidth with no ads. I record music via Mixxx upload to my stream. Gecko uses both IceCast and ShoutCast.
i use BX Hosting. 80 Dollar / year (ofc add free) 24/7 Auto DJ with 50GB storage. 320 Kbps Streaming. the quality is fine, support is fast and the Radio is 99.99% online. i did also add my own jingels and radio program. (monday = Jazz, Tuesday, Salsa, Wednesday DJ from EU, …